HOW TO ASSEMBLE YOUR CASE

Before you begin

1. Avoid scratching acrylic panels by placing a soft cloth or a protective pad under them during assembly. Tip: Use the included styrofoam piece.

2. Optional: Avoid fingerprints by wearing gloves when handling acrylic panels.

3. If you plan wall-mount your case, read this guide first to ensure proper installation.

Important!

- Every wall is different! Our included screws and wall plugs work best for masonry and brick walls. Check your wall type before installing to make sure you have the right hardware. You can use this guide for reference.

- Do not use power tools as they can over-tighten screws and damage the acrylic.

- Always lift and place your minifigures directly onto the shelf. Never slide them across the acrylic surface to avoid causing scratches. For tips on keeping your case in great condition, check out this guide.

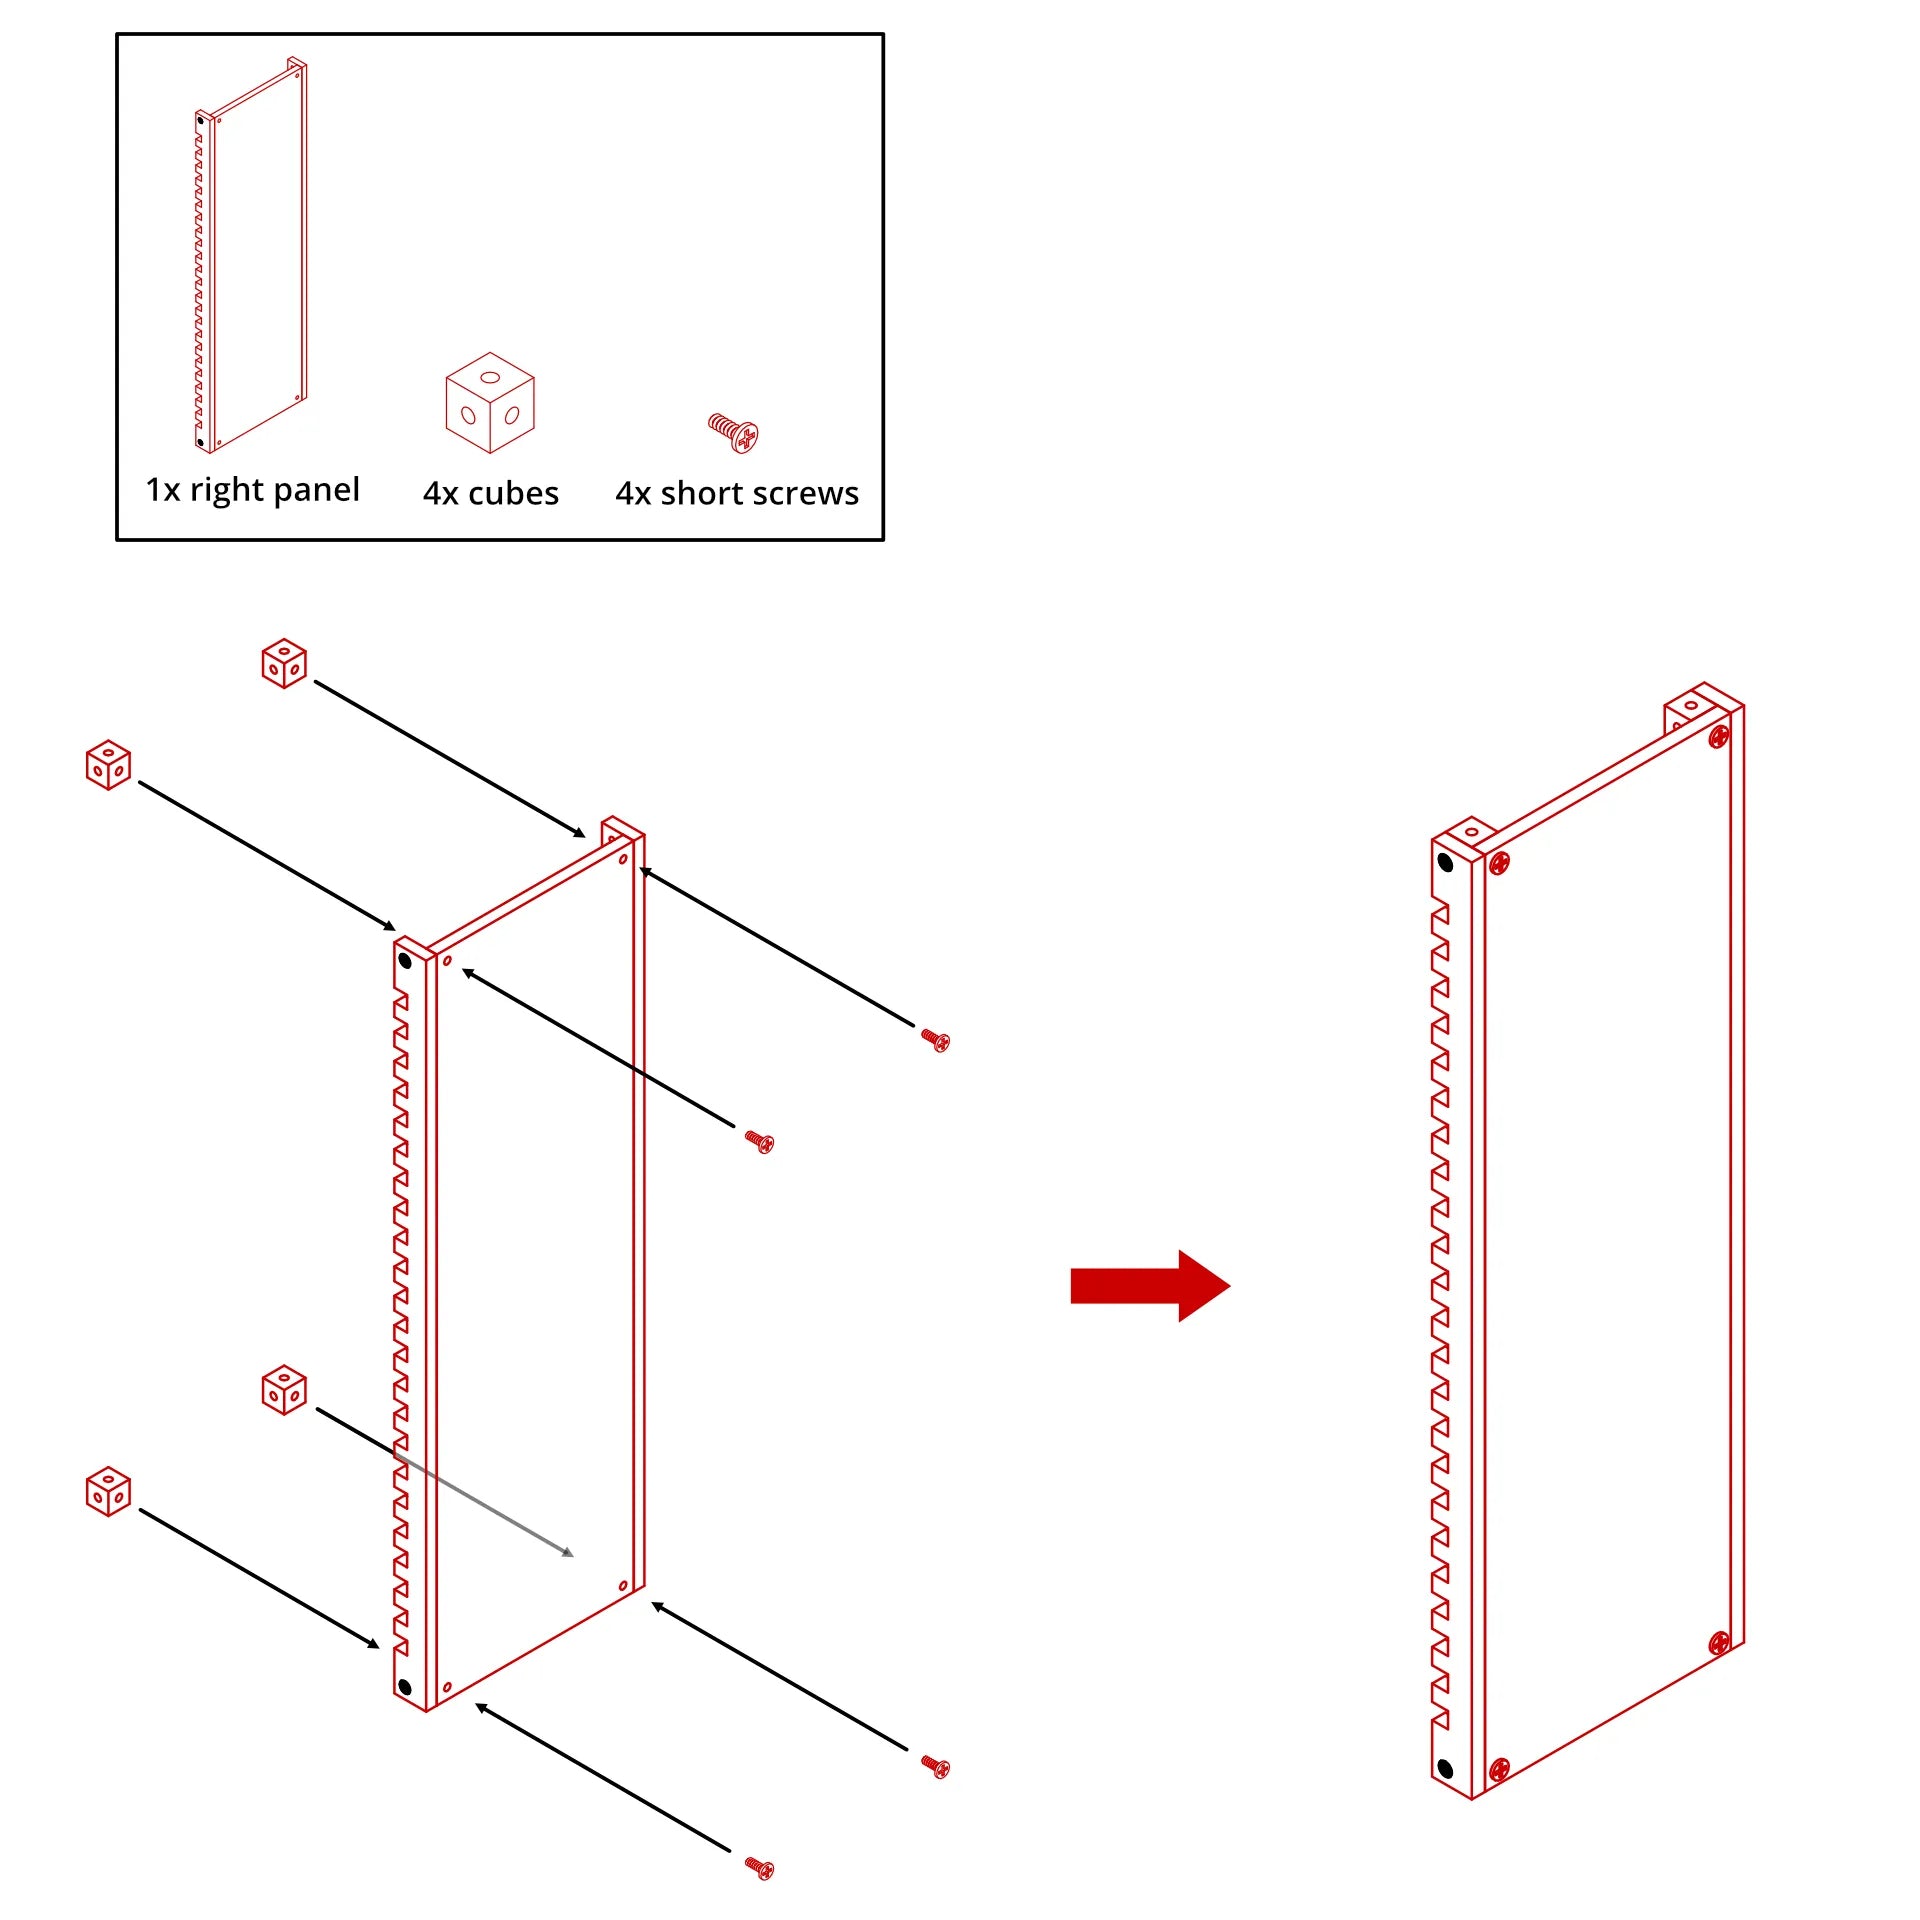
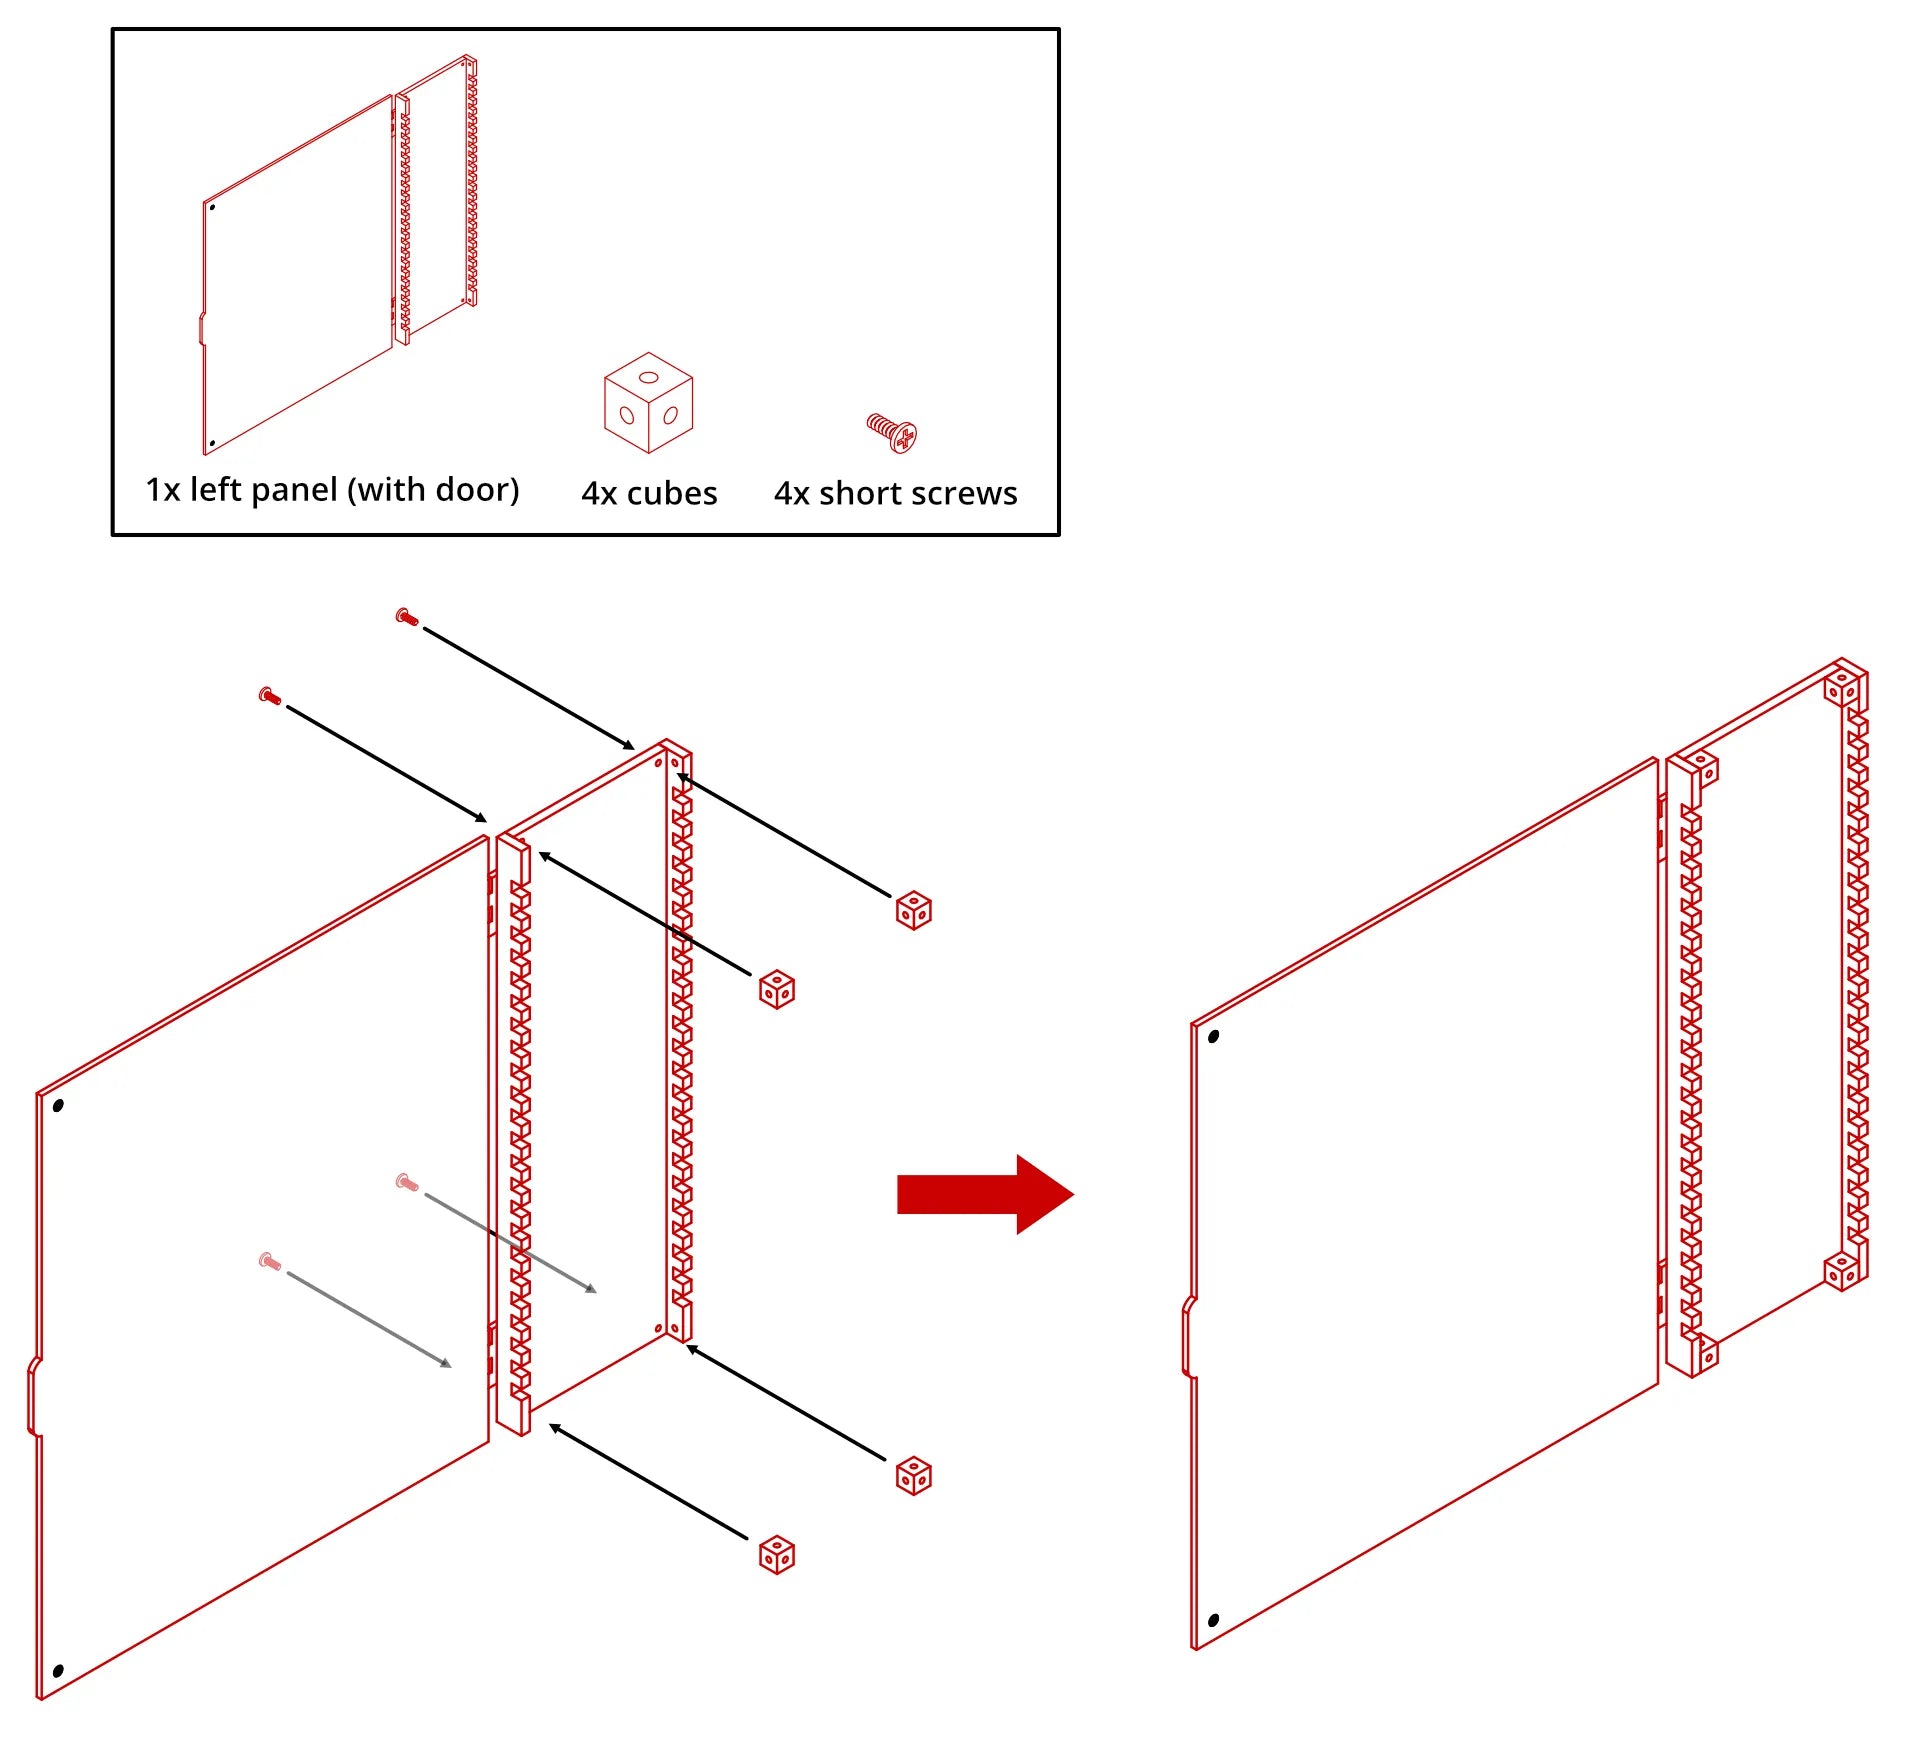
Step 1: Attach mounting cubes to side panels

Secure one cube to each corner of the right side panel and let side panel using short screws.

Right panel

Left panel

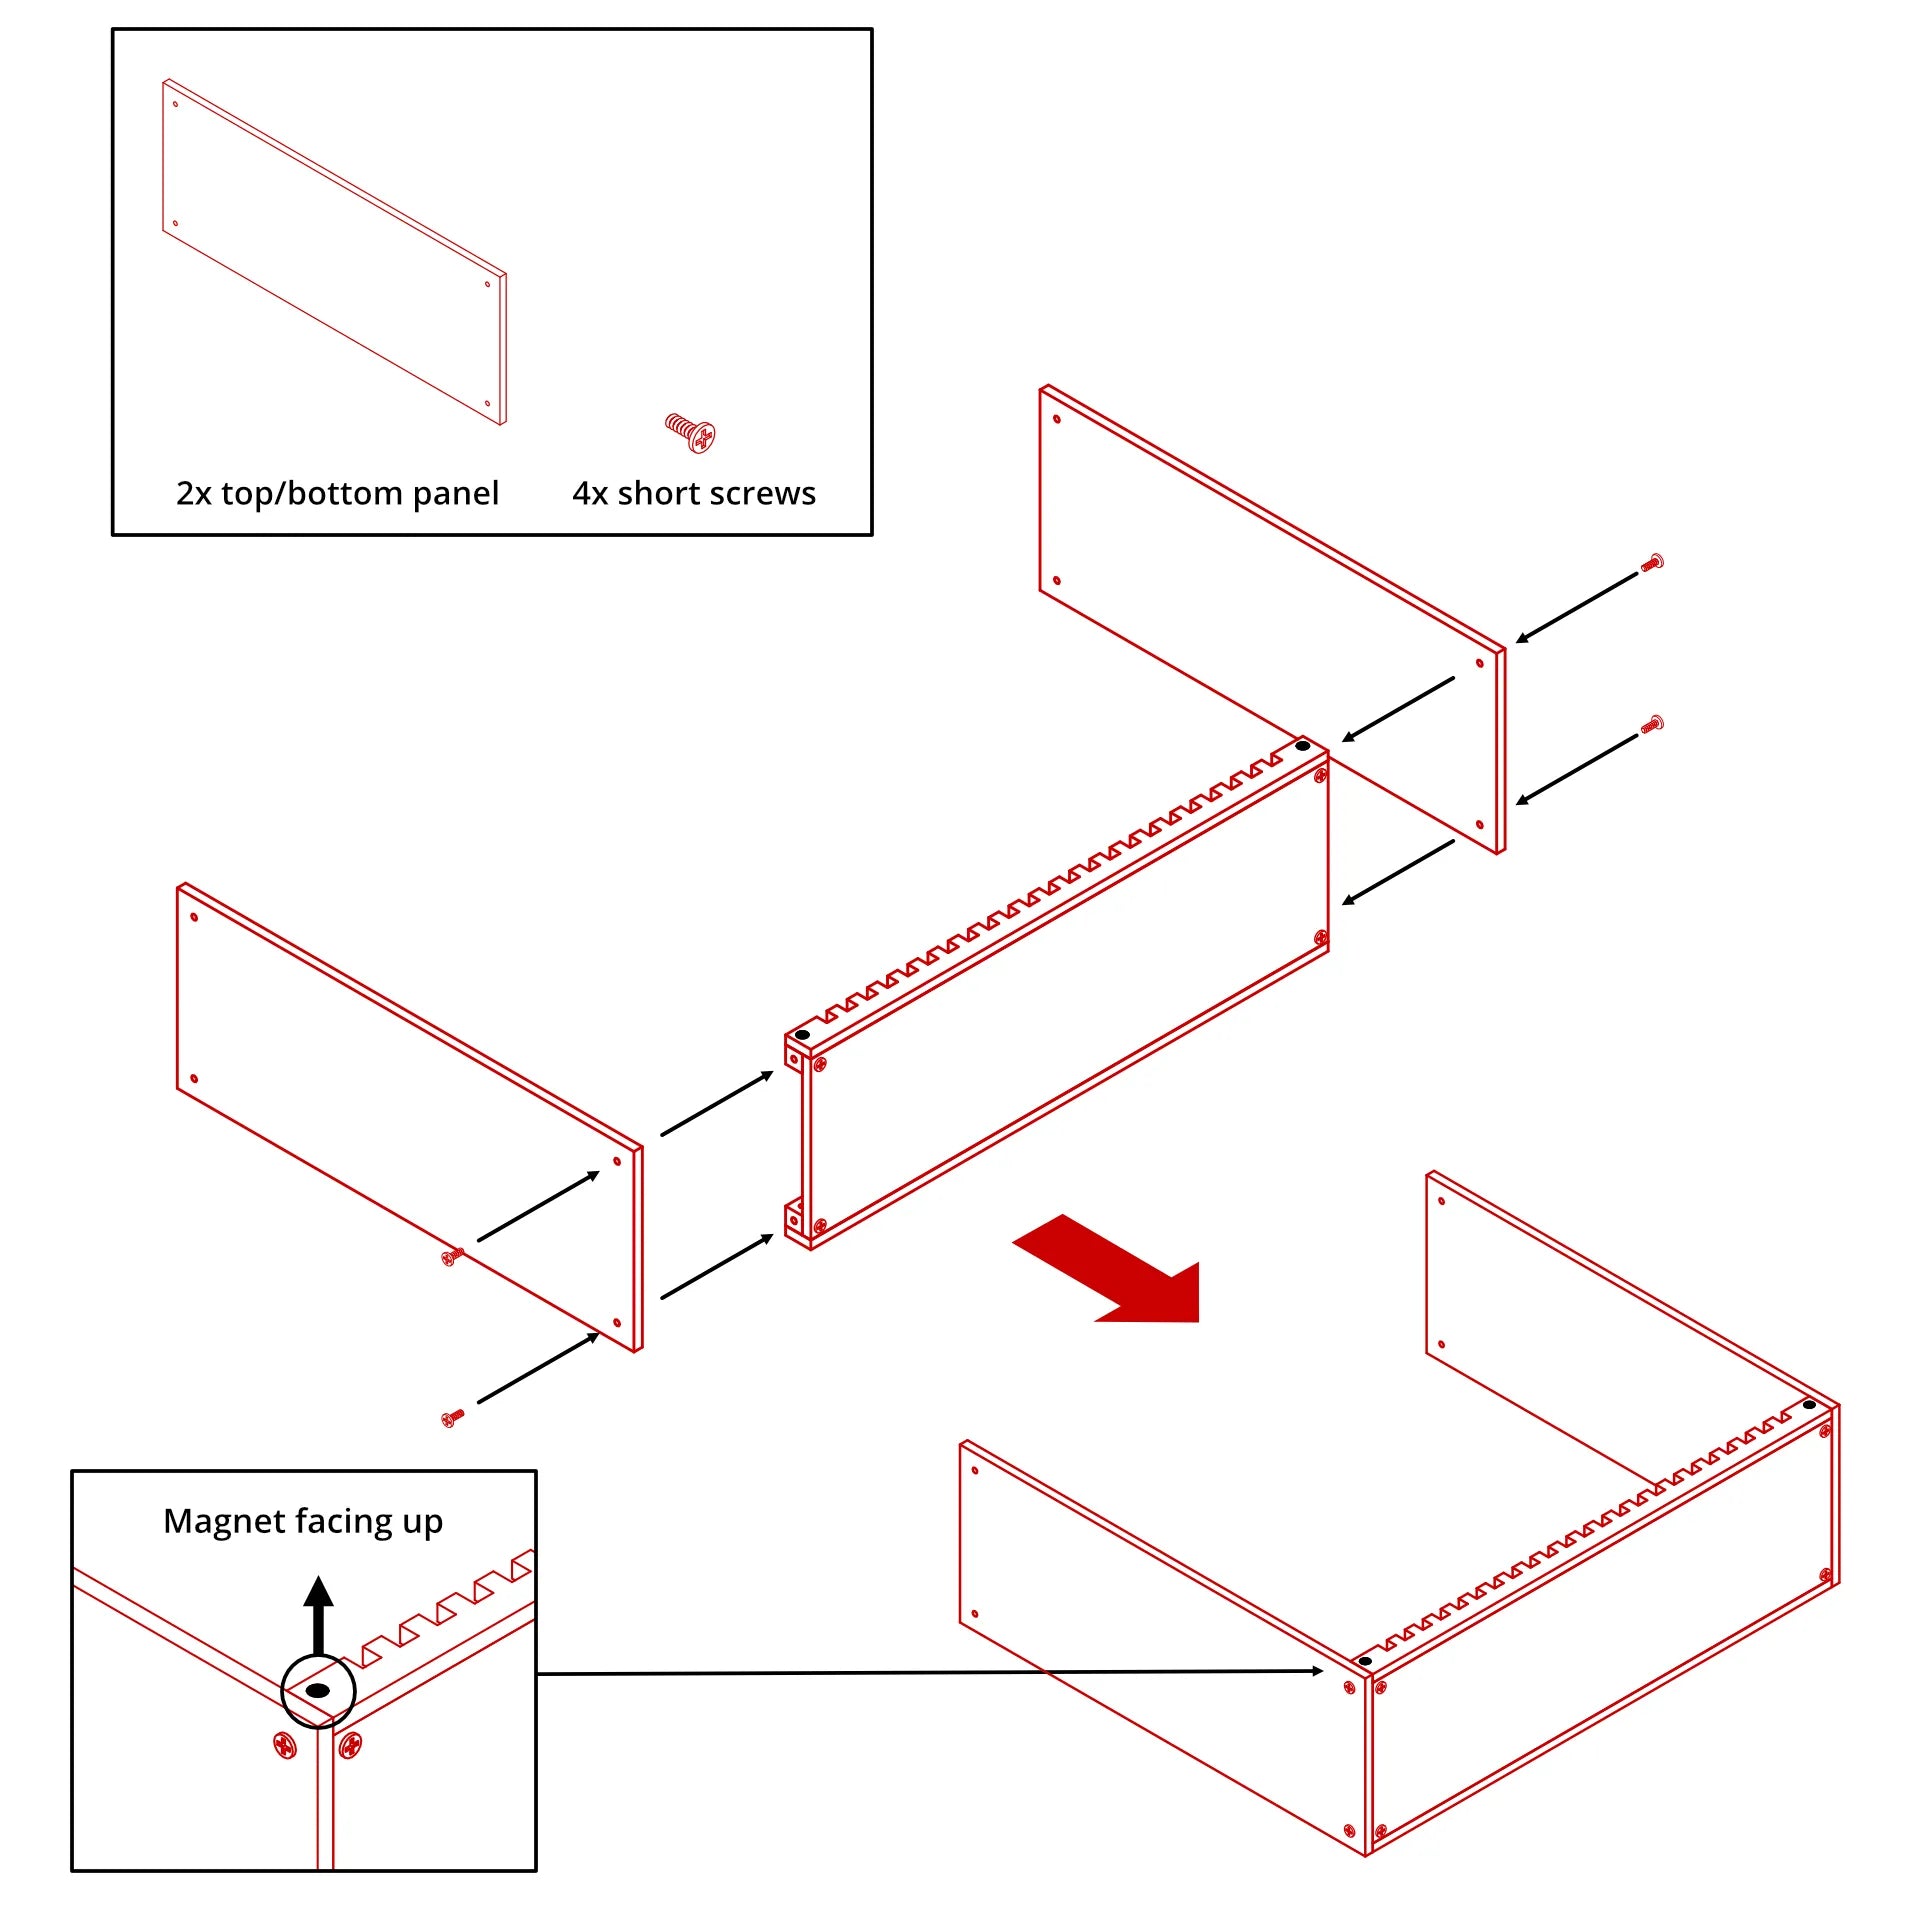
Step 2: Assemble top, bottom and right panel

1. If there is protective film on top and bottom panels, peel them off first.

2. Connect the top and bottom panels to the right side panel using four short screws.


Note: Make sure magnets on the right side panel are facing up.

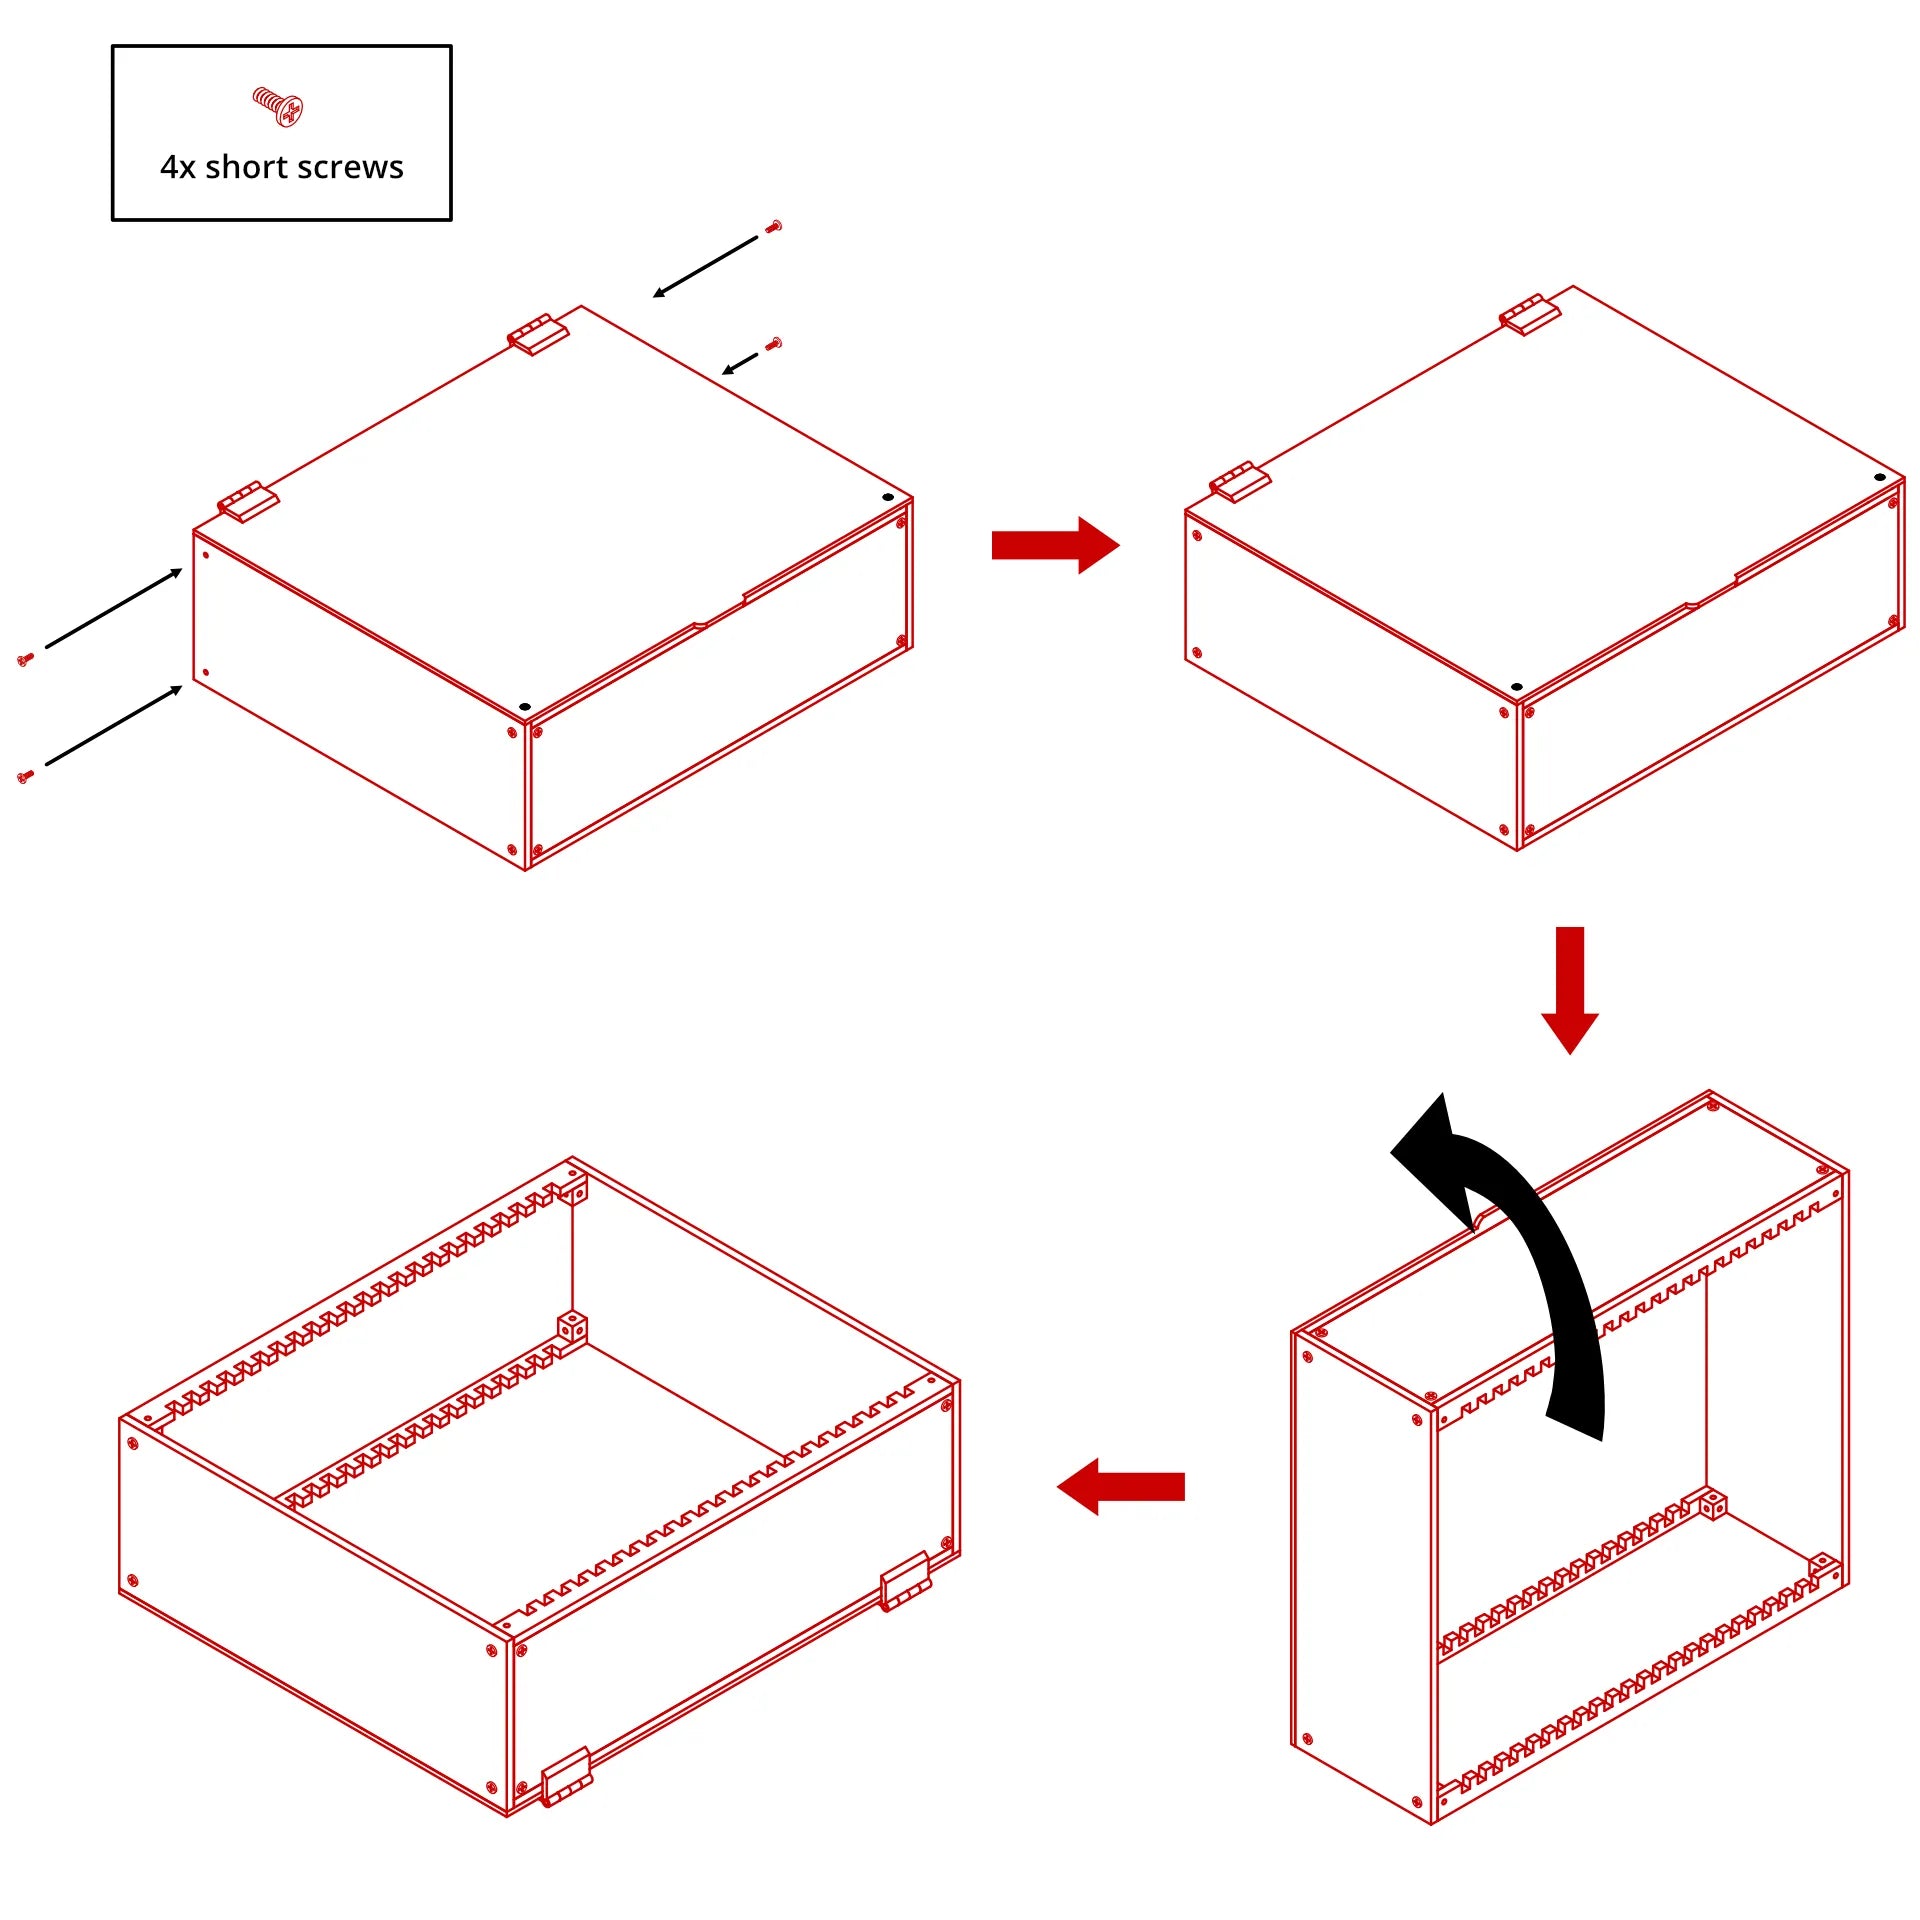
Step 3: Install left side panel (with door)

1. Carefully insert the left side panel between the top and bottom panels.

2. Align the metal cubes on the left side panel with the corresponding holes in the top and bottom panels.

3. Gently close the door. Align the magnets on the door with the magnets on the right side panel.

Step 4: Secure the left side panel

1. Secure the left side panel to the top and bottom panels using four short screws.

2. Carefully flip the entire case over so the back is facing up.

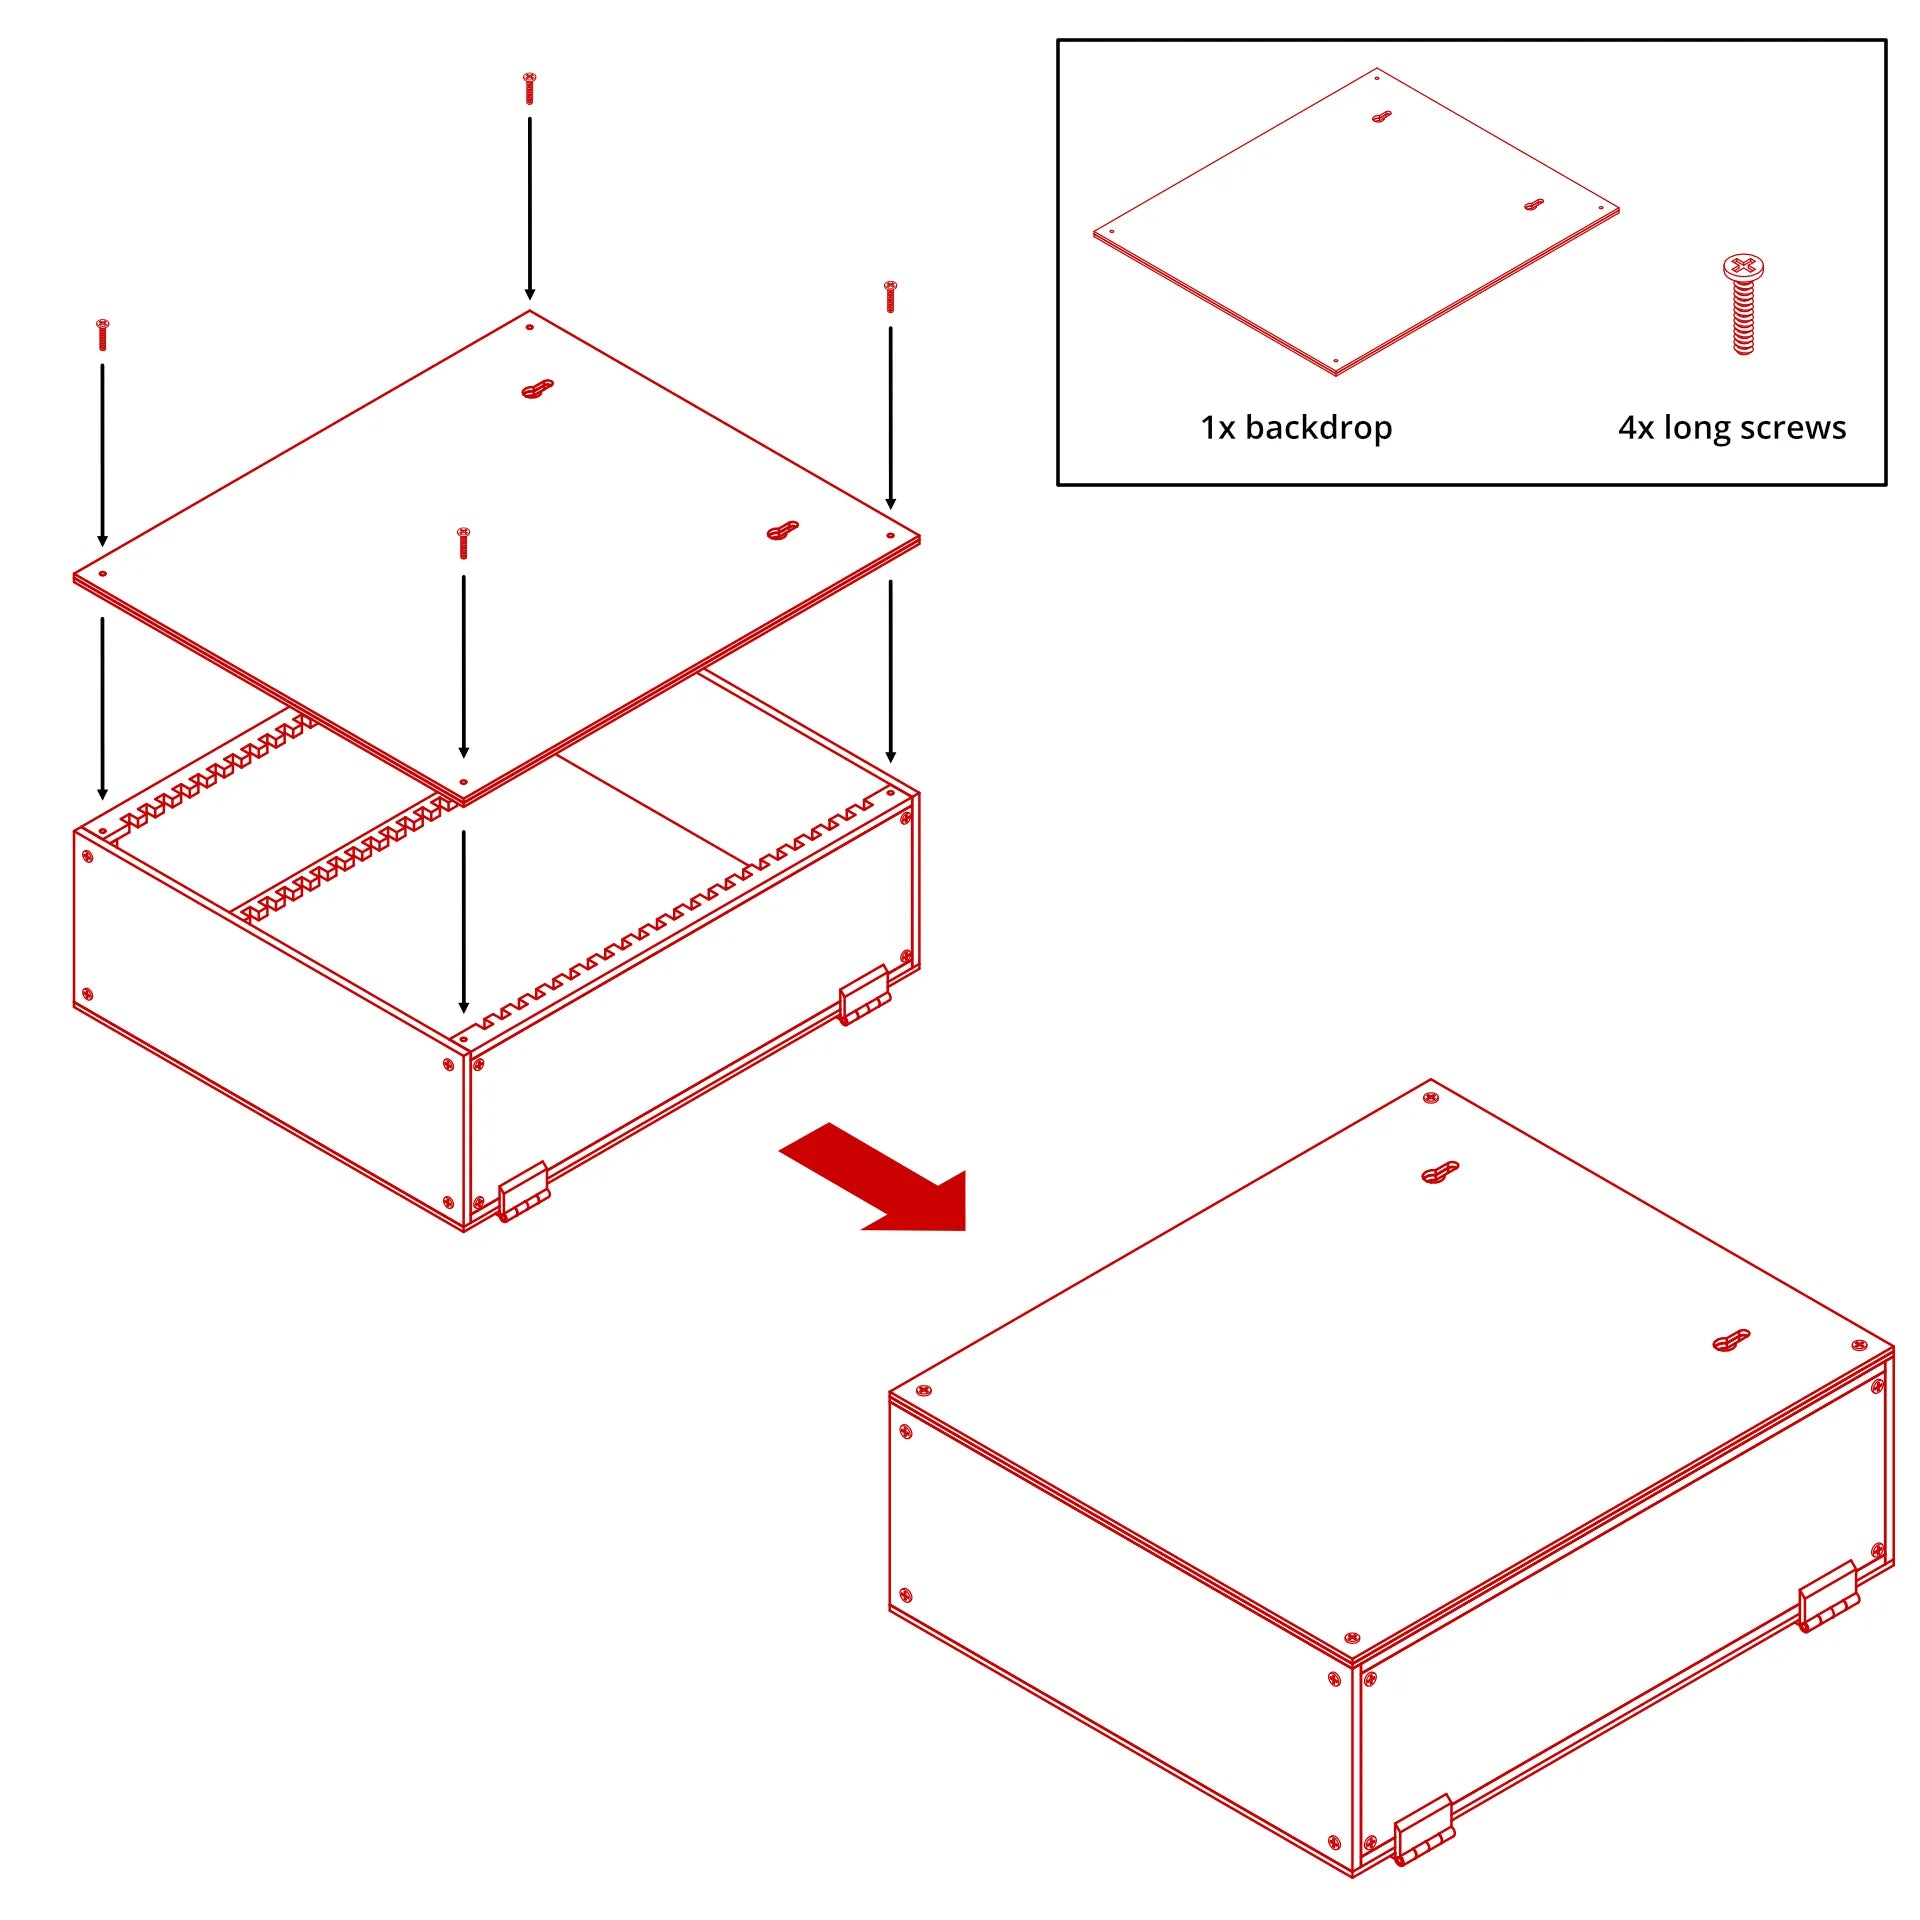
Step 5: Attach the backdrop
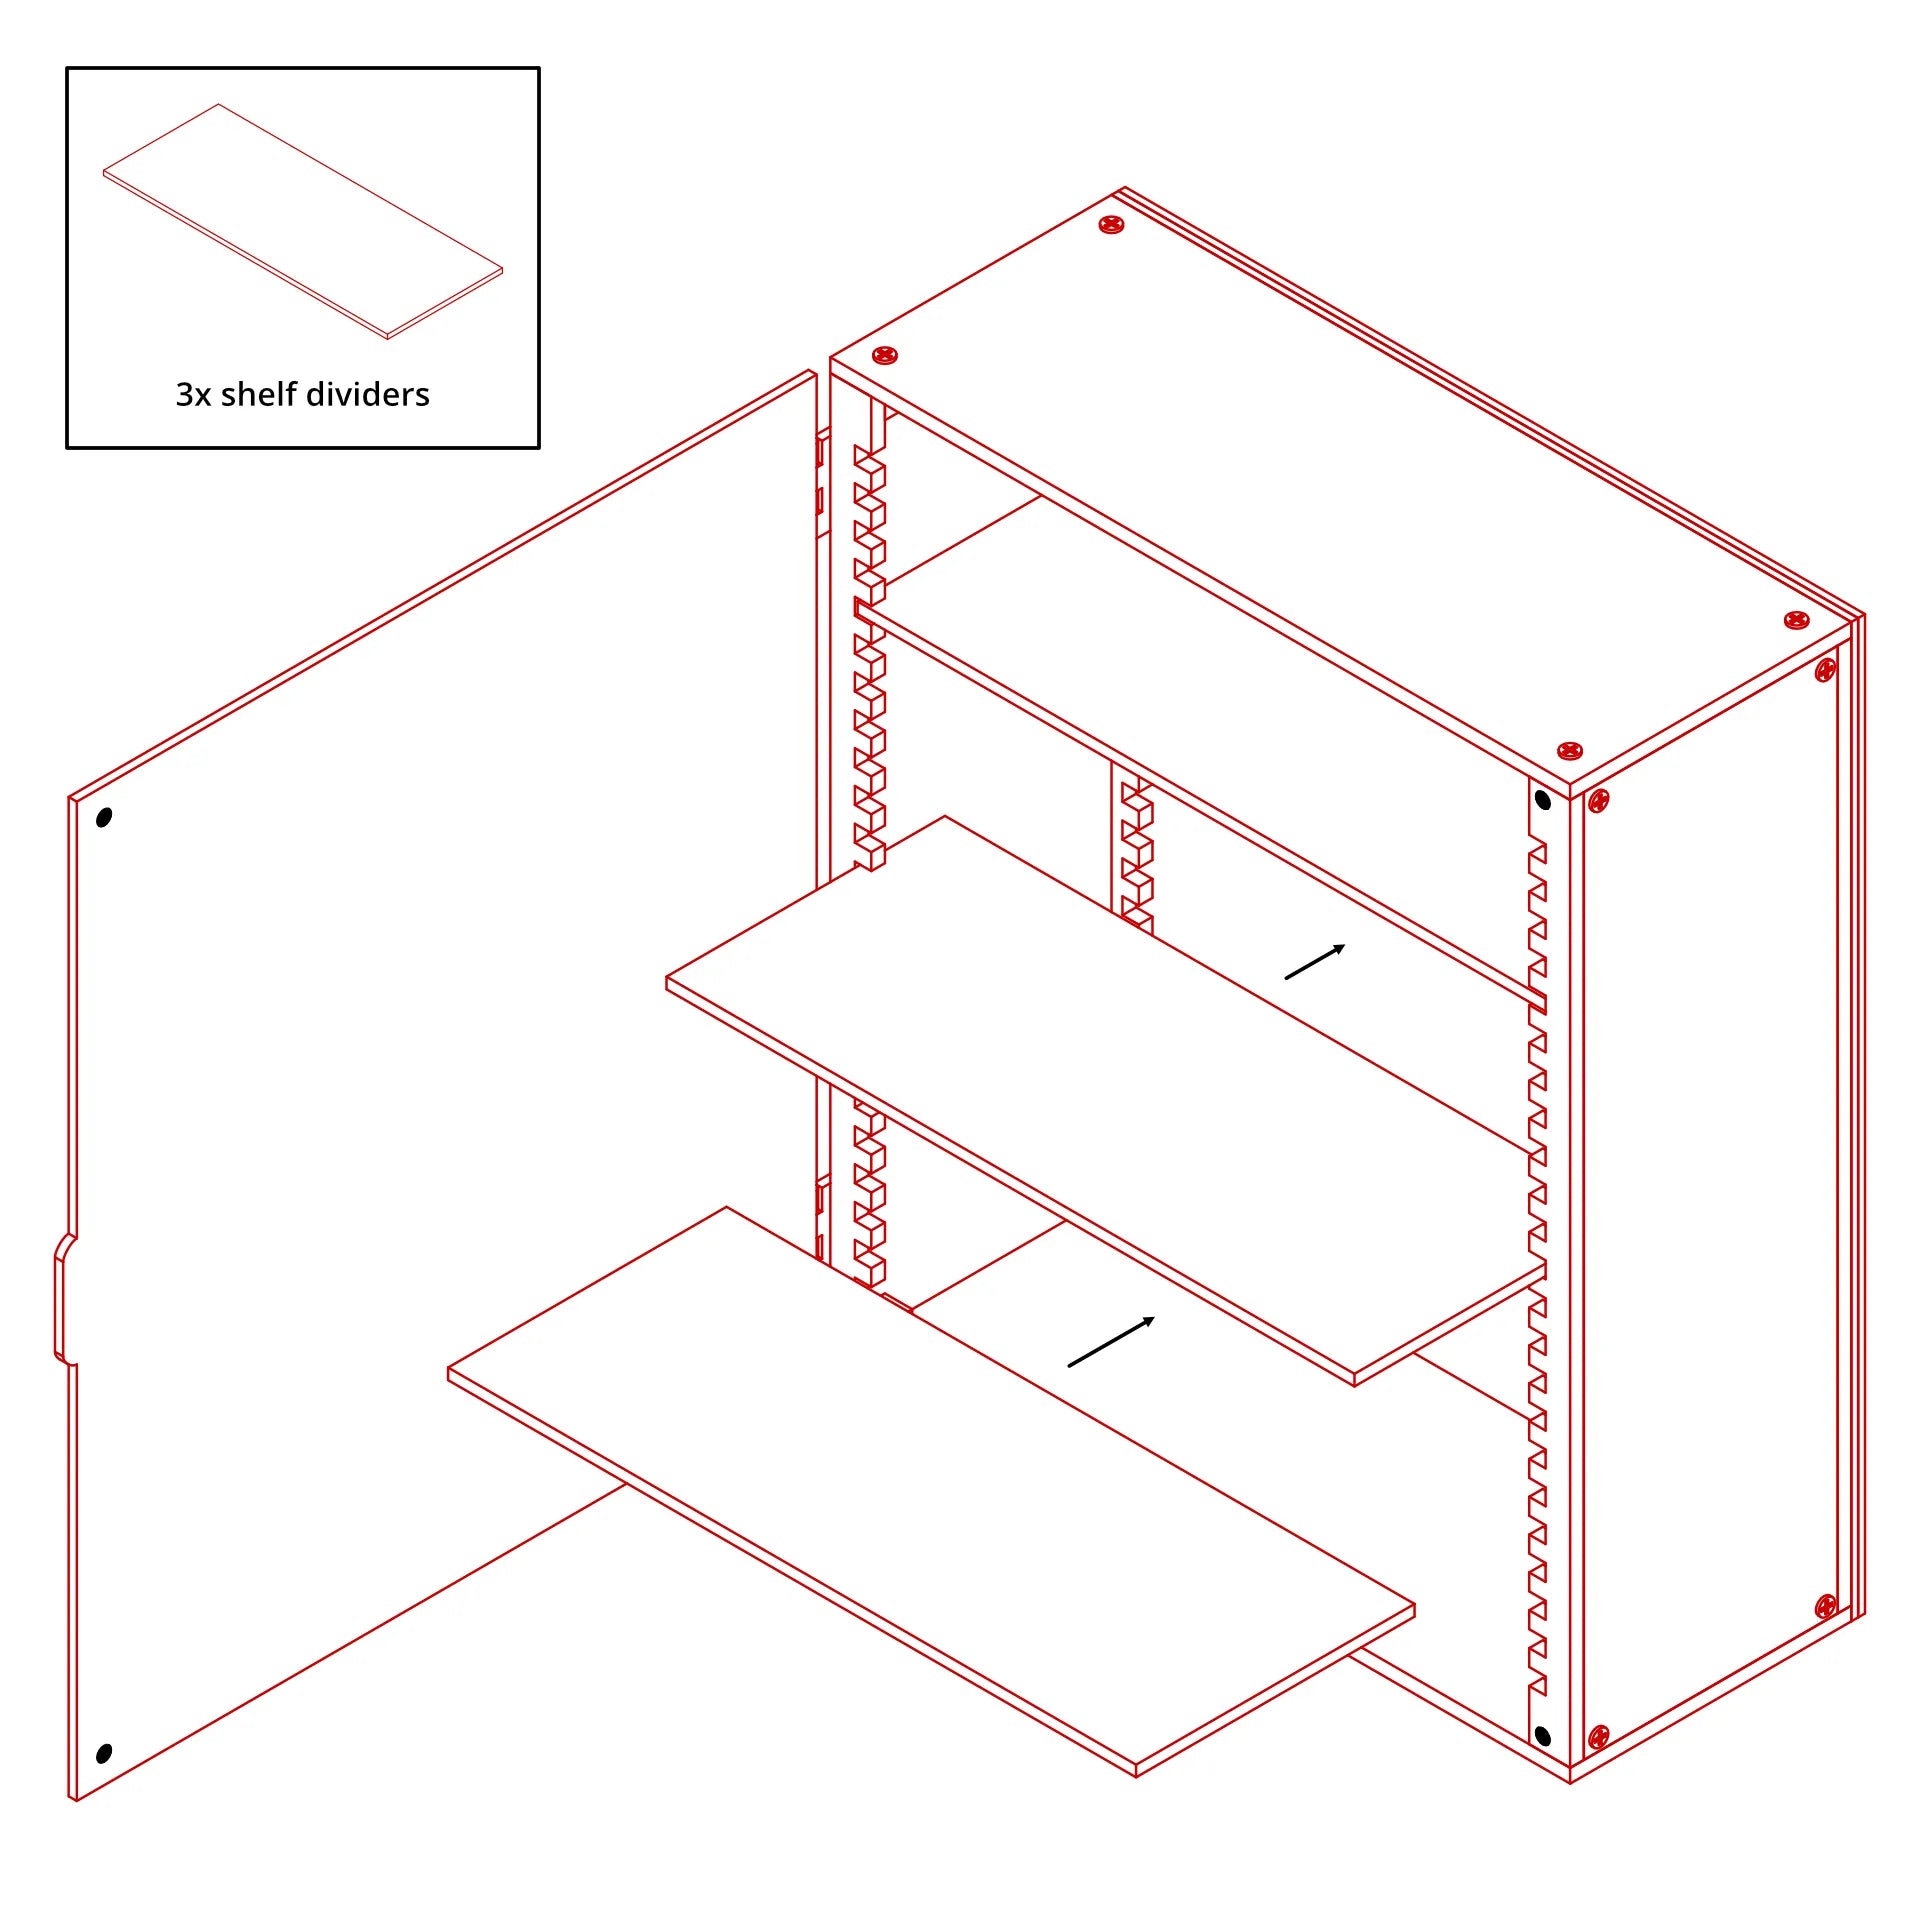
1. The backdrop has two colors (black and white), so make sure the color you want for your background is facing the right way.

2. Secure the backdrop using four long screws

Step 6: Add shelves

1. If there is protective film on shelf dividers, peel them off first.

2. Slide them into desired slots. Ensure they are level and securely positioned.

3. You can hang your case on your wall using the included wall-mounting screws and plugs. Alternatively, you can place it on your tabletop or shelf.


Note: Always lift and carry the display case from the base only. Never lift by the side or top panels.

Email us hello@brixtercase.com

Terms of Service

Privacy Policy

Return Policy

Disclaimer: LEGO® is a trademark of the LEGO Group of companies which does not sponsor, authorize or endorse this project.

© Brixter, LLC 2025